Views: 0 Author: Site Editor Publish Time: 2026-06-09 Origin: Site


Few experiences rival the nostalgic pleasure of grabbing perfectly frosted beer mugs from the icebox. This crispy-sudsy ideal dates back to the 1920s. Diners originally used it to serve summer root beer floats. Today, modern drinkers still crave this tactile, icy grip. However, achieving the perfect chill requires careful execution. You cannot simply throw warm glassware into a freezer. Poor preparation leads to serious issues. First, you risk catastrophic thermal shock. Second, excessive ice waters down complex flavor profiles. Third, extreme temperature clashes trigger uncontrollable foaming. We want to solve this dilemma. This article provides a science-backed breakdown of proper chilling techniques. We explore time-based frosting methods and thermodynamic realities. We also discuss when you should upgrade to active-cooling drinkware. Read on to master the perfect pour.
Frosted > Frozen: A light, opaque chill enhances the experience; thick ice layers ruin carbonation and water down the brew.
Speed Hacks Exist: While traditional freezing takes up to an hour, utilizing physical workarounds (like the wet paper towel or high-ABV liquor hacks) reduces chilling time to under 5 minutes.
Beer Type Dictates Temperature: Commercial lagers and pilsners thrive in heavily frosted mugs (43–53 °F), while complex craft beers and stouts only require a light refrigeration (58–62 °F).
Material Matters: Standard glass mugs lose their thermal charge quickly due to heat exchange; long-term cooling requires double-walled gel technology or thick-walled steins.
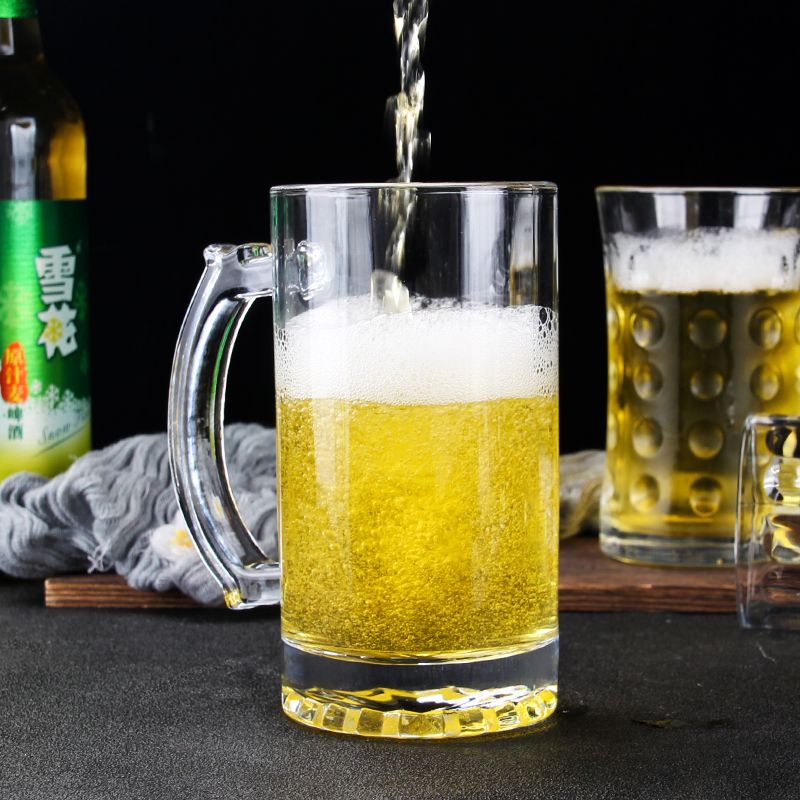
Many drinkers confuse a light frost for a deep freeze. Defining the success criteria matters. You want a frosted glass, never a frozen one. Frosted means you see a thin, opaque layer of white ice crystals on the exterior. The beer's color remains visible. This state offers optimal texture and temperature. Frozen means a thick, solid layer of hard ice forms inside the glass. This ruins the drinking experience.
We must address the foaming risk. Thick ice triggers a thermodynamic reaction. When room-temperature beer hits hard ice, it releases CO2 rapidly. This creates an uncontrollable foaming disaster. Your drink prematurely flattens. You lose the crisp carbonation you initially sought.
Drinkers also misunderstand the heat exchange reality. A mug does not generate cold. It simply absorbs heat from the beer. A standard glass mug aggressively lowers the beverage temperature. However, it rapidly thaws during this process. You only have a brief window to enjoy the peak frosted effect.
You can chill your drinkware using several different approaches. Your choice depends entirely on your available time. Below is a quick comparison chart detailing the methods.
Method Name | Estimated Time | Mechanism Used | Best For |
|---|---|---|---|
The High-ABV Swish | Under 1 Minute | Ultra-cold liquid conduction | Immediate needs |
Wet Paper Towel Hack | 3–4 Minutes | Evaporation/condensation cycle | Quick dinner prep |
Ice & Water Agitation | 5–8 Minutes | Physical ice contact | Pre-meal chilling |
Traditional Dry Freeze | 20–60 Minutes | Ambient freezer air | Planned gatherings |
Method 1: The High-ABV Swish
Method 2: The Wet Paper Towel Hack
Method 3: The Ice & Water Agitation
Method 4: The Traditional Dry Freeze
Keep a bottle of vodka in the freezer. It will not freeze at 0°F. Pour one ounce into a room-temperature mug. Swirl it vigorously for 30 to 60 seconds. Dump the liquor out, then pour your beer. The ultra-cold liquid rapidly conducts the chill directly to the glass walls.
Wrap the exterior tightly using a damp paper towel. Place it in the freezer. A rapid evaporation and condensation cycle begins immediately. This physical workaround accelerates the crystallization process. You get a perfect frost layer in mere minutes.
Fill your mug with cubed ice. Add a small splash of cold water. Swirl the mixture continuously. Make sure the ice physically contacts the interior walls. Dump the contents out. Place the empty glass briefly in the freezer to set the chill.
Start with a completely clean, dry, room-temperature mug. Place it upside down in the freezer. Upside-down placement serves a specific purpose. It prevents stale freezer air from pooling inside the glass. It also ensures an even temperature distribution across the entire surface.
Proper implementation requires strict attention to detail. You must prioritize safety and flavor integrity. Follow these guidelines when handling your glass mugs.
DO meticulously clean the glass. Residual soap or oils will freeze directly into the frost layer. This destroys head retention. It also introduces unwanted off-flavors into your drink.
DO place mugs on flat, uncrowded freezer racks. You need good air circulation. Interestingly, opening the freezer door occasionally is actually beneficial. Introducing ambient humidity helps form the beautiful outer frost.
DON'T use hot glassware straight from the dishwasher. Rapid contraction acts violently on the material. It will cause micro-fractures or catastrophic shattering inside your freezer.
DON'T freeze stemware. Delicate stems on tulip glasses or goblets become brittle at sub-zero temperatures. They can easily snap in your hand during use.
DON'T place wet-bottomed glasses directly on the freezer floor. They will cement themselves to the plastic lining. You risk breaking the base upon removal.
Brewing purists often debate the merits of extreme chilling. Many argue extreme cold numbs the palate. They claim it masks aromatic hop profiles. We acknowledge this skepticism. We frame frosting as a stylistic choice rather than a universal rule. Different beverages demand different thermal treatments.
Beverage Style | Target Temperature | Recommended Chilling Approach |
|---|---|---|
Macro-Lagers & Pilsners | 43–53 °F | Heavy frost (Freezer) |
Stouts & Complex Ales | 58–62 °F | Light chill (Refrigerator) |
Root Beer Floats | Sub-freezing | Maximum frost (Freezer) |
Iced Coffee / Diet Sodas | 35–40 °F | Medium frost (Freezer) |
Highly carbonated, light-bodied beers thrive in extreme cold. They benefit immensely from the crisp, refreshing bite of a heavily frosted mug. The icy walls enhance their thirst-quenching qualities on a hot day.
Darker beers require more care. We recommend brief refrigeration rather than hard freezing. Extreme freezing strips away roasted malt complexities. Guinness drinkers, for example, often note how deep freezes ruin the rich, creamy mouthfeel of a proper stout.
Perfectly frosted mugs are elite vessels for non-alcoholic options. A heavily chilled mug transforms root beer floats. The ice interacts beautifully alongside vanilla ice cream. Iced coffee and diet sodas also gain a dramatic texture upgrade.
You might realize standard glass thaws too quickly for slow-sipping. Traditional heat-exchange limits how long a drink stays crisp. Upgrading your hardware solutions provides long-term cooling benefits.
These serve as the baseline requirement for serious drinkers. Heavy glass constructions absorb more thermal energy. Thick handles physically separate your warm hand from the cold liquid. Brands like Libbey excel in this category. Heavy handles prevent body heat from rapidly warming the beer.
Modern enthusiasts often turn to double-walled plastic or steel. Manufacturers infuse these mugs with freezable active cooling gel. You store them upside down for two hours. They actively maintain optimal drinking temperatures for up to two hours. This technology completely bypasses the standard heat-exchange limitations.
Serious homebrewers require dedicated storage. Kitchen freezers often harbor strong odors from frozen foods. Storing glassware in a dedicated, temperature-controlled environment prevents the dreaded "freezer burn" smell. A standalone beer fridge guarantees pure, untainted flavor profiles.
High-end bars utilize tabletop commercial glass frosters. These machines spray liquid-CO2 directly into the glass interior. They instantly flash-freeze the surface in five seconds. While expensive, they represent the absolute pinnacle of beverage temperature control.
Achieving the perfect chill balances visual aesthetics against physical realities. You must understand thermal exchange to avoid foaming disasters. A properly prepared glass elevates your entire drinking session. Keep these key action steps in mind for your next pour.
Choose your timeline: Select the wet paper towel hack for fast results, or use the dry freeze for planned events.
Match the style: Freeze glasses for light lagers, but only refrigerate them for complex stouts.
Protect the gear: Always place dry glasses upside down to ensure an even, hygienic frost.
Consider upgrades: Invest in active-cooling gel mugs if you prefer slow, prolonged sipping sessions.
A: A standard glass mug stays cold for about 10 to 15 minutes. This timeframe depends heavily on your ambient room temperature. If you want prolonged chilling, double-walled gel-insulated cups can maintain optimal cold for up to two hours.
A: Glass only cracks due to thermal shock or expansion. Putting a hot glass fresh from the dishwasher into a freezer causes sudden contraction, leading to breakage. Leaving thick pools of water inside a weak vessel can also shatter it as ice expands.
A: Thick, hard ice heavily agitates carbonation. When warmer beer hits solid ice, it forces a rapid release of CO2. This creates massive foaming. You want a light exterior frost, not thick interior ice blocks.
A: Yes, you can safely store them there permanently. Make sure they are completely clean and dry first. Also, ensure they do not absorb ambient food odors from unsealed meats or meals stored nearby.


